How to install mysql on windows - Before the installation process first we must prepare the material that is
MySQL Download Source in
http://www.mysql.com/downloads/ MySQL last version when this material is made is MySQL 5.0.45. Please download the latest version and save it on your computer. Basically, the installation for each version of MySQL is not much different.
MySQL Installation Process
1. Once you get the MySQL source, then you need to extract the file to your computer.
2. Run the Setup.exe file in the MySQL source folder. See the following picture!
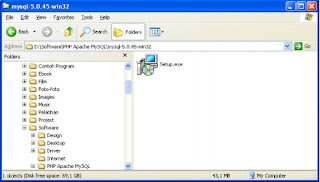 |
| Setup.exe file |
3. MySQL Setup will extract the MySQL installation files as shown below.
 |
| Installation Process Begins |
4. Next will display the MySQL Server 5.0 Setup Wizard for MySQL window. Click the Next button to begin the installation process.
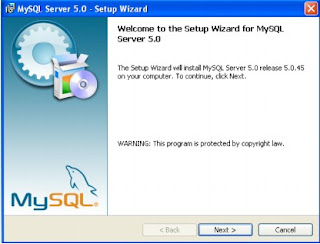 |
| Starting the Installation Process |
5. Next will be shown option to choose how to install. Choose Typical if we want to
install MySQL that is generally used.
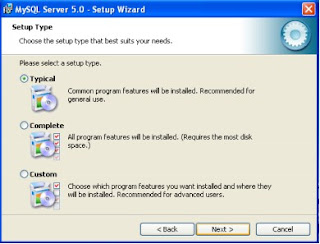 |
| Select an installation type |
6. Next will display the MySQL configuration information window, the installation type and destination folder installation. Click Install to start the installation process.
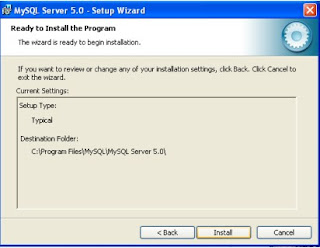 |
| Installation Configuration Information Window |
7. The installation process begins.
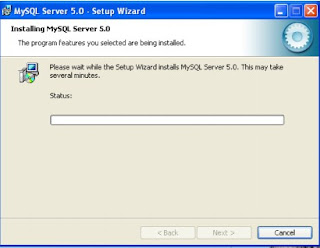 |
| Window Setup Type |
8. The next window displays information about MySQL Enterprise. Click Next to continue.
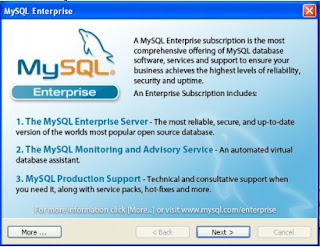 |
| Window MySQL Enterprise |
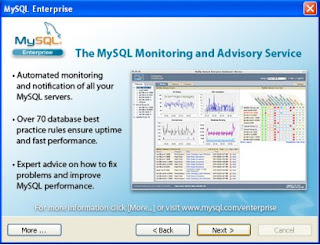 |
| MySQL Monitoring Information Window |
9. The installation process is complete and will be displayed as in the picture below. If we want to directly configure MySQL server (password, service etc) then select Configure the MySQL Server now checkbox and press Finish button.
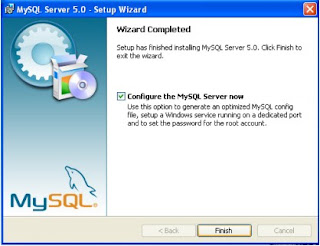 |
| Installation process Completed |
10. Next is displayed MySQL Server Instance Configuration Wizard window. Click Next to continue.
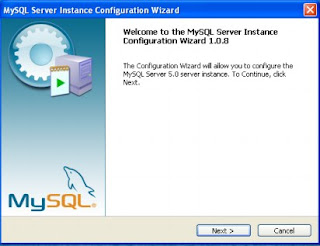 |
| Windows MySQL Server Instance Configuration Wizard |
11. Next there is a choice of desired configuration type, Detailed Configuration or Standard Configuration. Select it and click Next to continue.
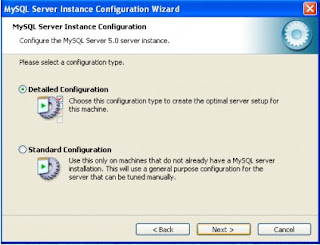 |
| Window Choice of configuration type |
12. There will then be a preferred server type option, Developer, Server, or Dedicated MySQL Server. Select one and click Nextto proceed.
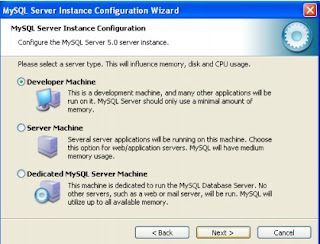 |
| Choice of MySQL server type |
13. Next there is the choice of using MySQL database, for Multifunctional, Transactional Only or Non-Transactional Only. Select one and click Next to continue.
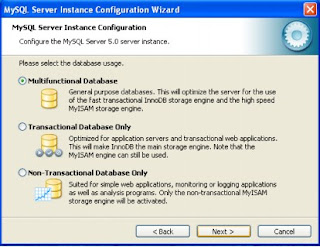 |
| Window Options Database usage |
14. Next there is a setting of InnoDB Tablespace Settings where asked to choose a place for InnoDB table space. Click Next to continue.
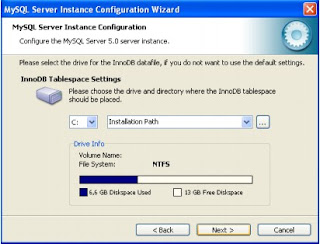 |
| Window InnoDB Tablespace Settings |
15. Furthermore there is an approximate choice of how much the user connection to the server. Select one and click Next to continue.
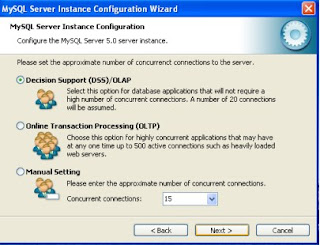 |
| Estimated Options How Big a User Connection to a Server |
16. Next there is a window to select the PORT number used for MySQL. Next to continue.
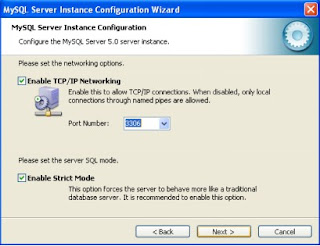 |
| Window choice of MySQL port |
17. Next there is a choice of MySQL service name that will be used by Windows. Select one and click Next to continue.
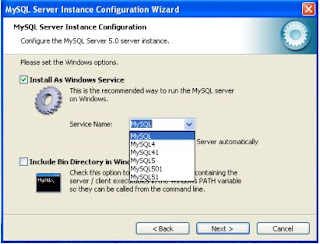 |
| Window Choice of MySQL Service Name |
18. Next is asked to modify the security. Choose a password for root (the highest user in MySQL) and click Next to continue.
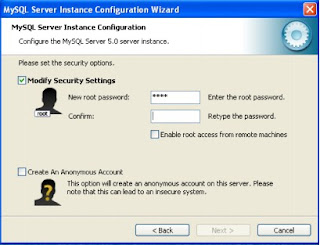 |
| Window Security Setting |
19. The configuration process is complete and click Execute to save the configuration and run the MySQL service.
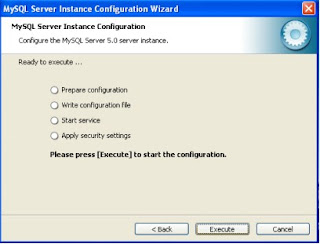 |
| MySQL server configuration process is complete |
That's
how to install mysql on windows, hopefully the tutorial can be useful for you in learning about the database and
programming languages.


Comments
Post a Comment